Stone-Clad Country Home: Inspecting Fixings, Joints and Movement
A practical inspection sequence for stone cladding: identify the facade system, recognise warning signs and verify concealed details without indiscriminate removal.
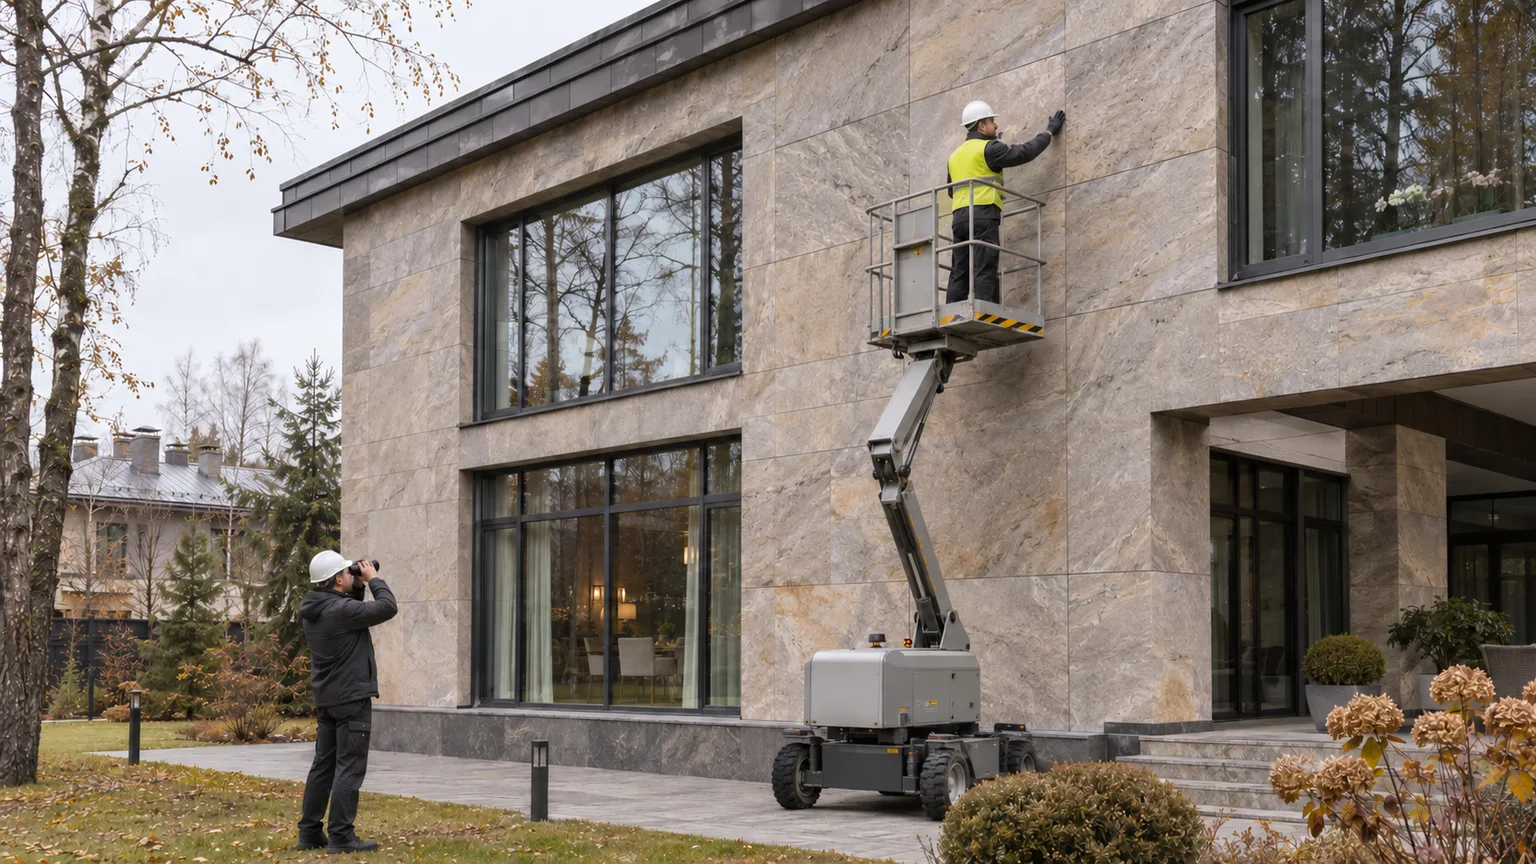
A stone-clad house can look monolithic while its safety depends on components that are almost entirely concealed: the backing wall, anchors or subframe, load-bearing and restraint fixings, joints, drainage routes and perimeter details. Asking which stone was selected is therefore only the beginning. A buyer needs to establish how each slab is supported, where water can leave the assembly and which movements the design allows.
GOST 9480-2024 covers natural-stone facing slabs and sets requirements for their characteristics, acceptance and control. Ventilated rainscreen systems fall within SP 522.1325800.2023, including Amendment No. 1 effective from March 2026. A material standard and a system code are useful evidence, but neither proves the condition of one particular house. That requires design records, as-built information and a proportionate survey.
Identify the facade system before diagnosing defects
Similar stone surfaces can conceal very different construction. Thin units may be bonded to a prepared substrate. Heavier veneer may rely on mechanical support and restraint. Large panels may hang from a metal subframe across a ventilated cavity. An outer masonry leaf may be tied back to the structural wall. Each arrangement has different failure modes and repair limits, so a generic description such as “granite facade” is not enough.
Request elevations, sections and details at corners, plinths, parapets, windows and doors, together with the stone and fixing specification, as-built drawings, concealed-work records and repair history. If the house has been altered, compare this evidence with the checklist for buying after a major reconstruction. Architectural visualisations are not substitutes for working details or records of what was actually installed.
- confirm the stone type, thickness and panel format from documentation rather than appearance;
- identify the facade system and the manufacturers of its critical components;
- compare the designed panel and joint layout with the completed elevations;
- record replaced slabs, renewed sealant, flashings and fixing repairs;
- mark areas where records are missing or site changes were not documented.
Begin with a safe whole-elevation survey
Photograph complete elevations from repeatable viewpoints before focusing on individual marks. Look for patterns: a wave across the plane, stepped rows, joints opening along one level, repeated edge chips near fixings or several panels leaning in the same direction. Then inspect corners, parapets, cornices, plinths, entrance canopies and areas above paths, doors and terraces.
Do not strike a suspect slab, pull it by hand or improvise access from a domestic ladder. A bulge, visible displacement, full-depth crack, fallen fragment or evidence of fixing movement warrants an exclusion zone below and assessment by a facade specialist. The first visit should locate risk, not attempt to prove strength through an uncontrolled test.
The stone is only one part of a high-value house inspection. The guide to old engineering behind expensive finishes helps separate surface quality from hidden systems, while changing cracks require the structured monitoring described in geodetic observation of house movement.
Joints reveal movement and water paths
A joint is not merely a visual line. Depending on the system, it may remain open to support drainage and ventilation, be filled with mortar, or use a flexible sealant. An open joint is not automatically defective, and sealing every gap is not automatically an improvement. An unplanned seal can block drainage and change how the cladding moves.
Record torn or debonded sealant, rigid repair patches, edge staining, efflorescence, rust marks and water traces below windows. Follow the moisture backwards: did it enter at the parapet, a window perimeter or a horizontal ledge, or is it draining from the cavity? The diagnostic method is similar to the wider review of water and drainage risks around a site: a visible symptom should be traced to its source rather than hidden by a coating.
Transitions between stone and metal, glazing, render, roofing and the plinth deserve particular attention. These materials do not respond identically to temperature and moisture. The design must accommodate movement through supports, restraint and joint layout. There is no responsible universal joint width for every stone, panel size and subframe.
Verify concealed fixings through a survey programme
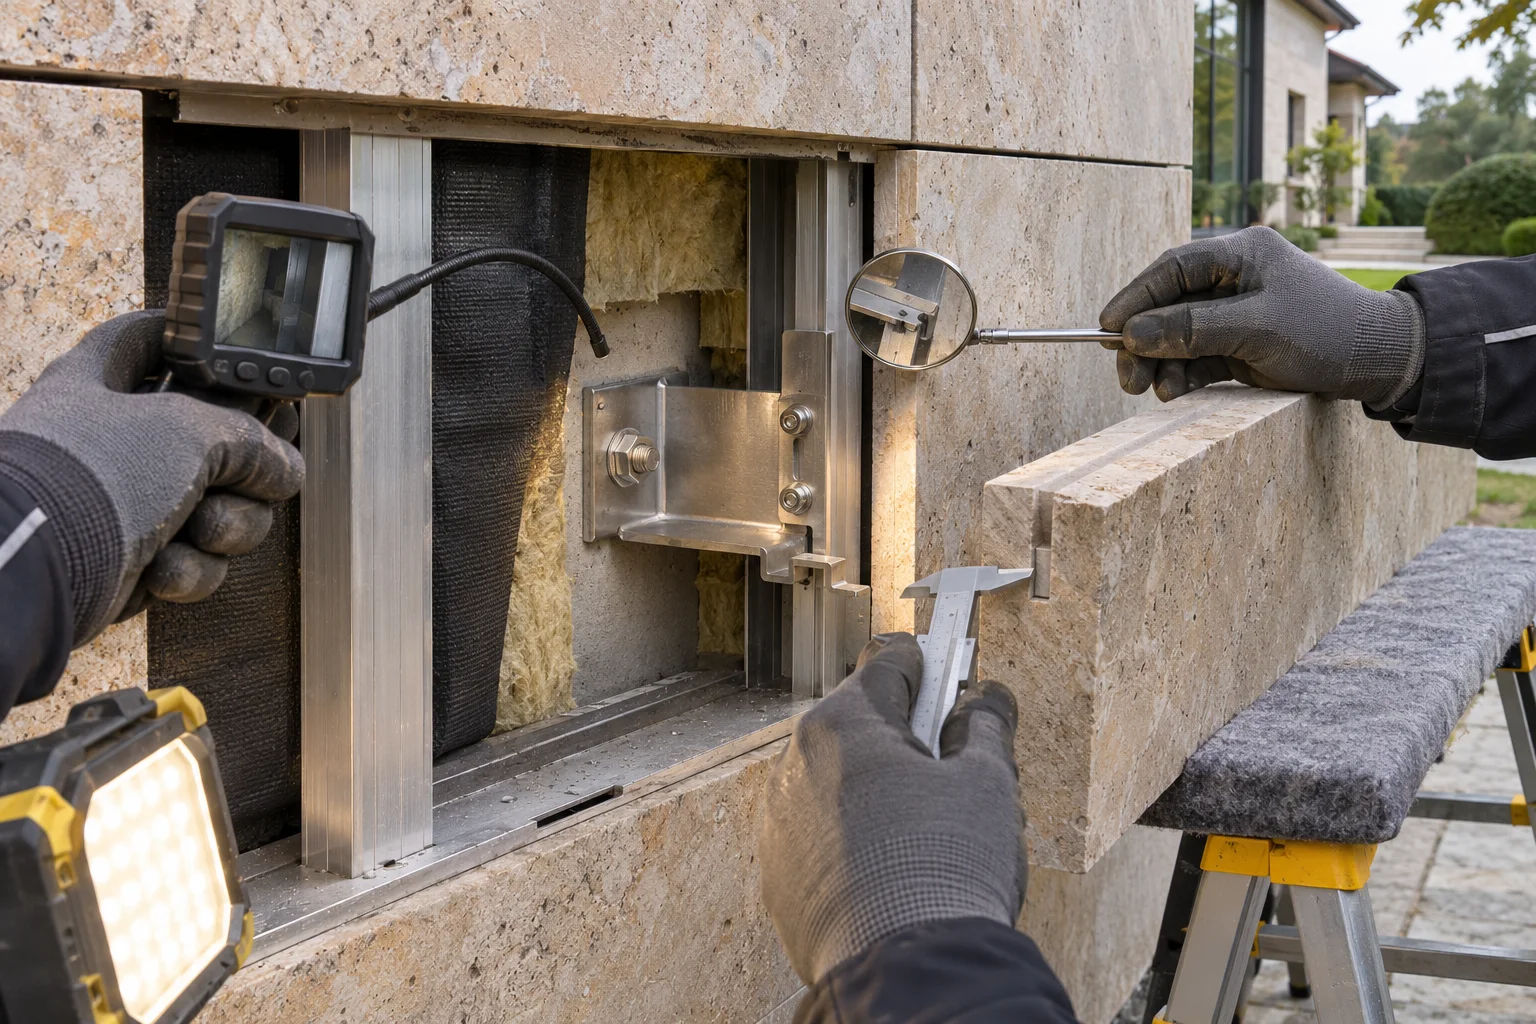
Surface photography cannot establish the condition of concealed fixings. A sensible sequence begins with records and non-destructive observations, then selects representative locations for borescope inspection or a limited opening. The sample should not be random: it may include a typical bay, a corner, a window perimeter, upper and lower levels and a location showing distress. The assembly must then be reinstated using an agreed detail.
SP 522.1325800.2023 covers design, installation and operation of ventilated facade systems. GOST R 70573-2022 addresses durability parameters for cladding elements and fastening details, while GOST R 57263-2016 covers fasteners linking masonry leaves and other structures. These documents help frame the investigation, but the test method, sample locations and acceptance criteria must be set by a qualified specialist for the actual house.
At an opening, compare bracket, anchor and rail material and geometry with the design. Inspect protective coatings, corrosion, contact between incompatible metals, restraint positions, stone kerfs and edges, cavity continuity, insulation and membranes. Pull-out testing or laboratory examination of stone should follow an investigation plan. An arbitrary test can damage a sound area while producing evidence that is not representative.
Separate seasonal movement from an isolated chip
An impact chip and a family of cracks repeating at matching window corners tell different stories. Systemic distress usually has a pattern: defects recur around openings, at junctions between building volumes, along a long uninterrupted band or on one solar orientation. Dated photographs taken from comparable viewpoints, a defect map and measurements at selected points are more useful than a folder of unrelated close-ups.
If a crack changes, do not immediately fill it and erase the evidence. Locate it on the elevation, photograph it with scale and connect the observation to weather, recent work and any movement in the backing structure. The guide to monitoring cracks in a country house explains reference points and the role of a surveyor. Repairing the stone without understanding movement behind it may produce a neat but short-lived result.
Water and freeze-thaw weather expose weak details
Late autumn and thaw periods can make drainage paths and uneven drying easier to see. One damp patch, however, does not prove that the stone is failing. Inspect parapet caps, drips, sills, window perimeters, rainwater goods, plinth details and cavity outlets. Distinguish ordinary dirt, biological growth, efflorescence and actual deterioration of the stone.
Facade readiness belongs within the broader building-envelope review. The summer-to-winter house checklist connects cladding with roofs, gutters and ground-level drainage. Do not specify acidic cleaning, water repellents or wholesale joint replacement from photographs alone. Compatibility should be confirmed for the actual stone and tested in a discreet area.
Build an evidence file before purchase
A buyer needs more than a stone brochure. The useful file contains the working design and approved revisions, as-built panel layout, concealed-work records, stone and fastener documentation, test reports, warranty conditions, inspection logs, locations of replaced panels and an access strategy. Missing records do not prove imminent failure, but they increase investigation scope and budget uncertainty.
- create numbered elevations showing openings, panel zones and every recorded defect;
- separate immediate safety concerns, items requiring instrumental investigation and cosmetic issues;
- obtain a conclusion on the support system and representative concealed details;
- price access as well as repair, including platforms, scaffolding and protection of landscaping and routes;
- define repair materials, workmanship and quality-control evidence before work begins;
- add dated facade photographs and inspection actions to the operating log.
The facade file should transfer to the management team with the other building systems. The guide to operational handover to a new team sets out that wider package. Whether the property is on the Rublevo-Uspenskoye or Novorizhskoye corridor, expensive stone does not compensate for an unknown support system. A disciplined survey turns an impressive elevation into a manageable asset.